How to Write an AI Night Rendering Prompt
When people prompt an AI for a night rendering, most of them don’t write a prompt — they make a wish. “Make the lighting premium.” “High-tech night vibe.” “Atmospheric.” The model has no idea what premium means.
Take one wall. A beginner writes: wall washer lights up the wall. A lighting designer writes: wall washer mounted at the cornice, aiming down, 3000K, smooth even gradient. The gap is not vocabulary. It is four decisions: where the fixture is mounted, which direction it aims, what colour temperature, and what the light does to the surface.
I have spent ten years doing lighting design. This is the structure I use, written out so you can copy it, with two complete prompts from real projects at the end.
A professional prompt has exactly four parts
Part 1 — the role sentence. Give the model an identity and lock the task down.
You are an office-building lighting designer. Convert this daytime scene into a night lighting scene (keep the scene unchanged).
“Keep the scene unchanged” earns its place. Without it the model feels free to redesign your building while it is in there.
Part 2 — the zone list. This is the body of the prompt and where the work is. One line per lit zone, and every line carries all four decisions: zone + fixture + aiming direction + colour temperature + light effect.
Part 3 — overall requirements. One line for atmosphere, one for image quality, one for the hour of the night (“8:30 PM” is not the same picture as “midnight”).
Part 4 — negative constraints. What you do not want, stated explicitly: no overexposure or visible hot spots, no contour lighting tracing the outline of the building. When a night render comes back wrong, nine times out of ten the problem is not that you wrote too little. It is that you forbade too little.
One more thing worth knowing: if the daytime photo has harsh shadows across the facade, add “repair the shadows” to Part 3.
Template 1: tower plus podium
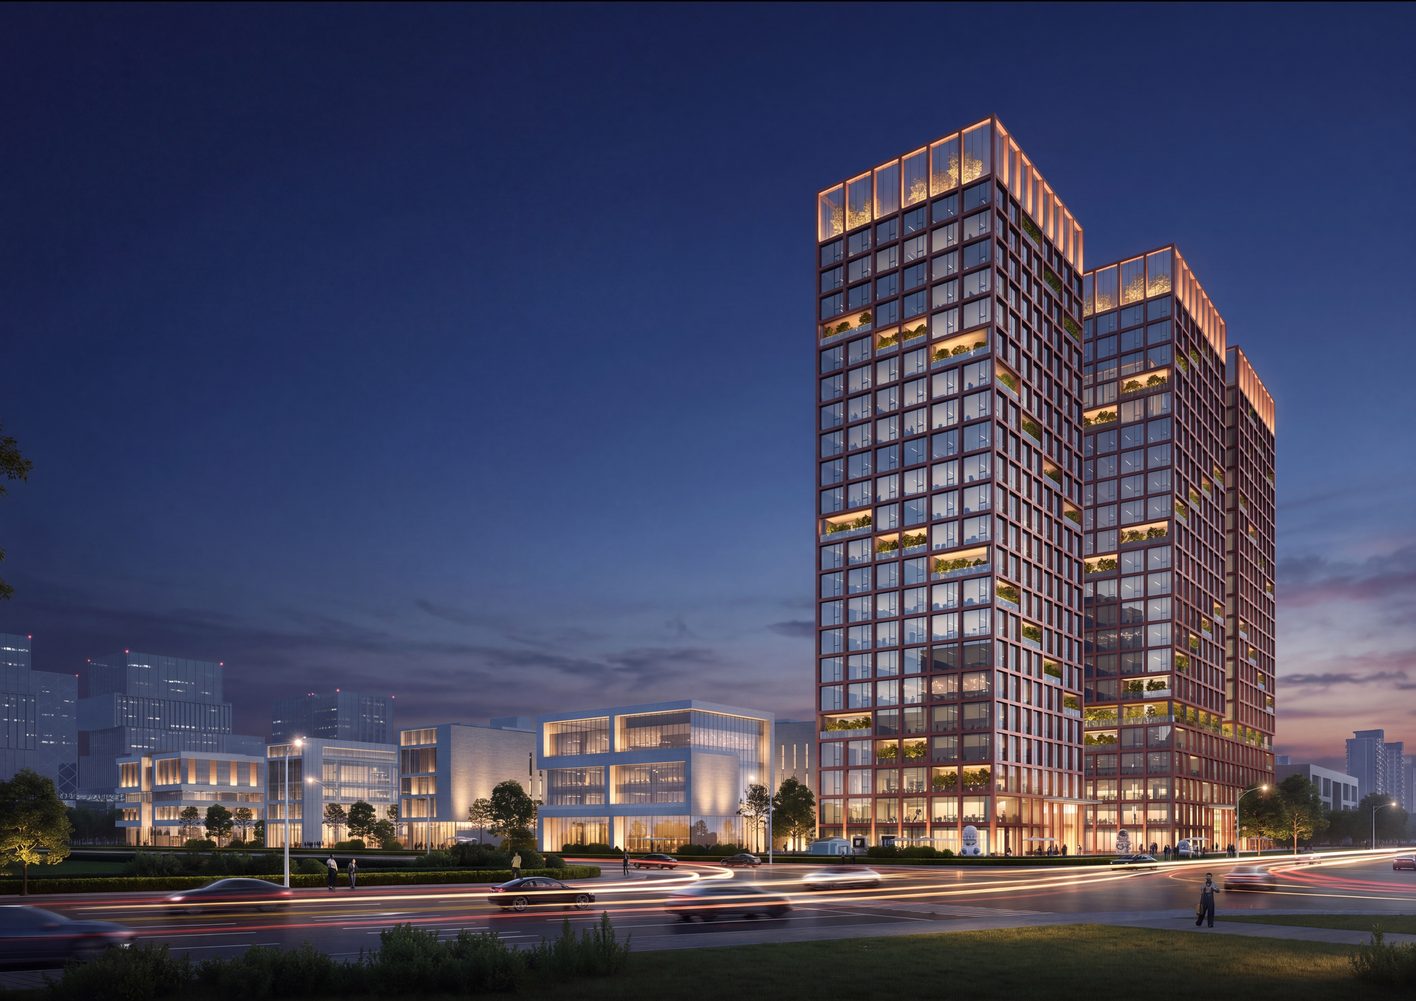
Here is a real project. The daytime image went in as-is; the night image came out of the prompt printed below it.
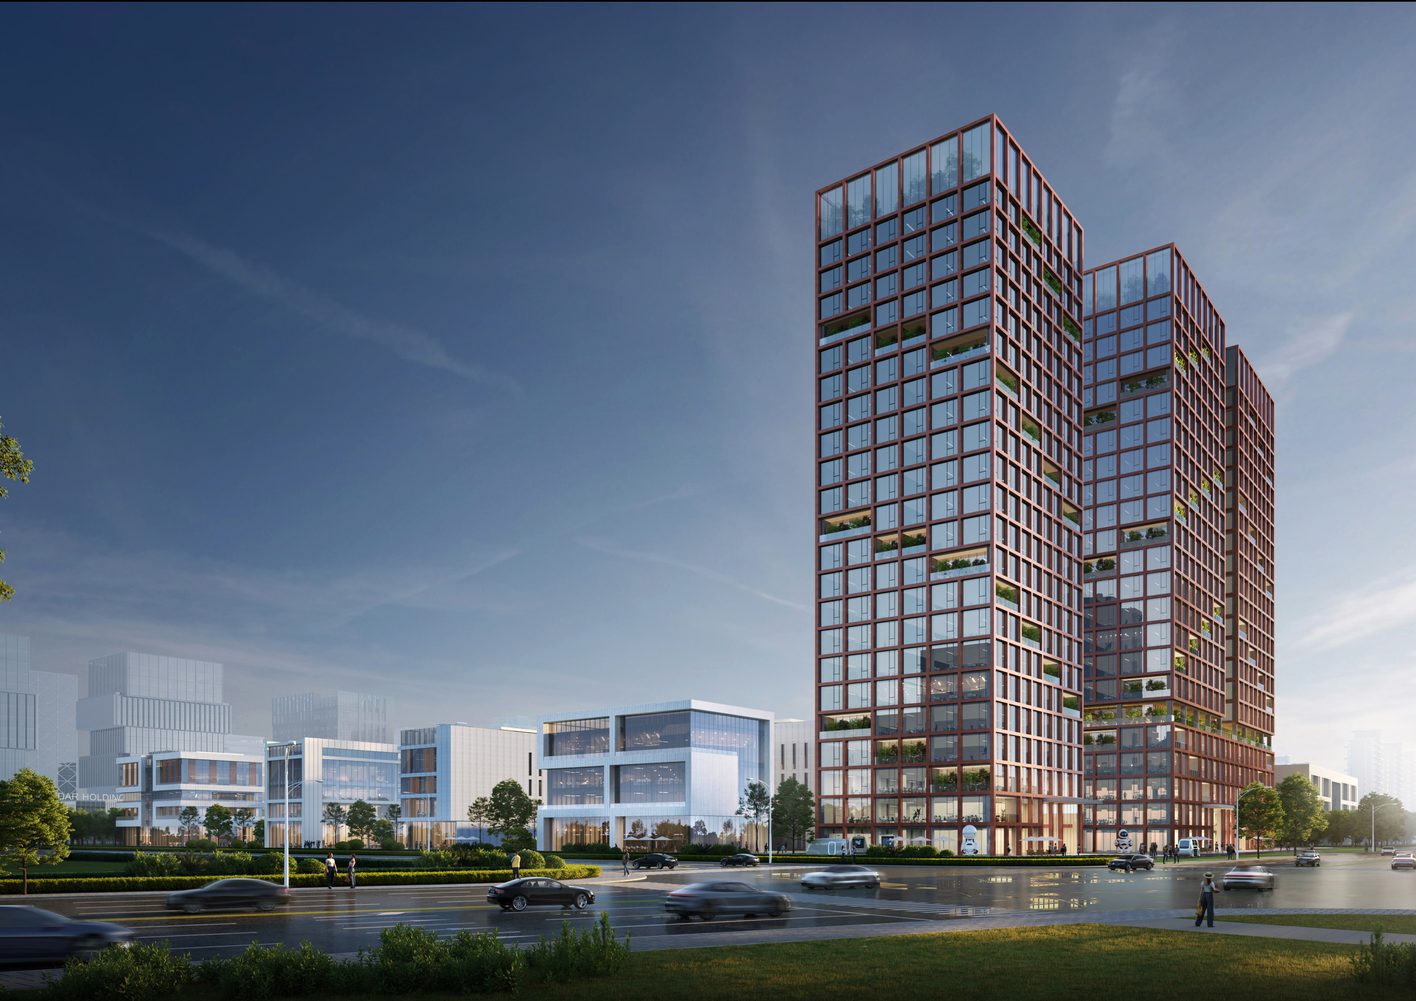
You are an office-building lighting designer. Convert this daytime scene into a night lighting scene (keep the scene unchanged):
- Tower crown: the rectangular frames on all four faces — high-output sill-mounted luminaires washing the glass frame structure, warm 3000K.
- Tower crown: planted trees inside the crown — in-ground spike lights uplighting the canopies, warm 3000K.

- Tower facade: open (glassless) terraces — in-ground uplights washing the terrace soffits evenly, low illuminance, fine material texture, warm 3000K.
- Tower facade: terrace planting — spike lights uplighting the canopies, warm 3000K.
- Tower facade: soffits + planting must stay unified in tone and colour temperature — the architect designed them as one continuous element.
- Tower interiors: low-level office spill light, some floors lit and some dark, realistic interior glow, dimmer than the facade lighting, colour temperature randomised between 2200-4000K.

- Entrance and ground-floor columns: recessed downlights in the entrance canopy for functional lighting; in-ground uplights grazing the columns, warm 3000K.
- Entrance and L1-L2 interiors: warm welcoming environment, high brightness, 2700K.

- Low-rise facade: the frame of the left low-rise building — in-ground wall washers uplighting the top slab of the frame, high brightness, warm 2700K.
- Low-rise facade: large stone wall surfaces — pole-mounted floodlights washing the stone evenly, warm 3000K.
- Low-rise entrance and interiors: warm interior, high brightness, 2700K.

- Landscape: street trees in the planting strips — warm in-ground uplights on the canopies, 3000K.
- Road: LED street lighting, even coverage, the brightest element in the image, warm-white 4000K.
- Traffic: long-exposure red and white car light trails, clean and lively urban atmosphere.

- Overall atmosphere: harmonious, clear bright-dark hierarchy, high-end night photography quality.
- Image quality: keep original resolution, 8K-quality detail, crisp material texture.
- Sky: simulate 8:30 PM.
- Strictly no overexposure or visible hot spots; strictly no contour or outline lighting on the building.
Three things in that prompt are worth pulling out, because they are the difference between a render that reads professional and one that does not.
The building is broken into three vertical sections — crown, facade, podium and entrance — and each section is described from the inside out: core, then planting, then curtain wall. Feed a model spatial logic and it lights with spatial logic. Feed it a list in random order and you get a list in random order.
Interior spill light is randomised between 2200K and 4000K. Uniform colour temperature is the single fastest way to make a render look fake. In a real office tower at half past eight in the evening some floors are working late, some are empty, some have warm desk lamps and some have cool ceiling panels. Randomised interiors are what make the eye accept the image.
Brightness is ranked, not maximised. Road brightest, then entrance, then facade, and interiors dimmest of all. If every zone in the prompt asks to be bright, nothing in the image reads as bright. Dark zones are not wasted space — they are where the composition comes from.
Template 2: media facade
A different building, and a deliberately different treatment.
You are an office-building lighting designer. Convert this daytime scene into a night lighting scene (keep the scene unchanged):
- Tower crown: linear luminaires inside the vertical aluminium fins of the curtain wall, continuing down the facade, cool white 4000K.
- Tower crown: the core — wall washers uplighting it evenly so it reads clearly through the glass, warm 3000K.

- Facade: linear luminaires in the vertical fins forming a media facade, content: black-white-grey Chinese landscape-painting imagery, cool white 4000K.
- Facade interiors: low-level office spill light, some floors lit and some dark, must stay dimmer than the facade lighting, randomised 2200-4000K.

- Podium facade: linear luminaires in the vertical fins, content: warm shimmering-water effect, 3000K.
- Podium retail interiors: soft even interior glow, dimmer than the facade linears, warm 2200K.

- Ground-floor entrance and interiors: warm welcoming environment, high brightness, 2700K.

- Landscape: street trees uplit with warm in-ground fixtures, 3000K; courtyard lawn with garden luminaires, trees uplit at 3000K.
- Road: LED street lighting, even, brightest element, warm-white 4000K.
- Traffic: long-exposure red and white light trails.

- Overall atmosphere: harmonious, clear bright-dark hierarchy, high-end night photography quality.
- Image quality: keep original resolution, 8K-quality detail, crisp material texture.
- Sky: simulate 8:30 PM.
- Strictly no overexposure or visible hot spots; strictly no contour or outline lighting.
Note the split: the media facade runs cool at 4000K with landscape-painting content, while the podium turns warm at 3000K and 2200K for retail atmosphere. Zoned warm-cool contrast is a design decision. One tone across a whole image is a default, and defaults look like defaults.
An honest note on “8K”. In a prompt, “8K” is a style keyword — it pulls the model toward fine detail and crisp texture. It is not a resolution setting. Current AI image generation, LDR included, tops out at 4K output. Write it because it helps the look; do not expect an 8K file.
The reverse-prompt method
The fastest way to learn this is to run it backwards. When you find a night render you admire, upload it to any capable AI and send this:
Analyse this night rendering. For each luminous zone, output: zone (where the fixture is mounted), fixture type, aiming direction, colour temperature, brightness rank (brightest / secondary / dim), and light effect (even / gradient / scalloped). Also give me: the overall atmosphere in one sentence, the time of night, and the three darkest areas in the image.Do that to ten good images and the four decisions stop being a checklist you consult and start being how you look at lighting.
The structure is copyable. The judgement inside it is not.
You can paste either template into a model right now. What you cannot paste is the reason each line says what it says.
Every line in that zone list is a decision someone already made: that terrace soffits take in-ground uplights rather than downlights, that interiors have to sit below the facade or the tower reads as a lantern, that the road is the brightest thing in frame. Template 1 works for a tower-plus-podium composition shot from across the street. Your building is not that building, and the moment you swap in your own site you are back to making those calls yourself.
Which is the honest case for both of LDR’s modes. Rendering mode is for when you want to make every call — you write the prompt, and the system holds the hard constraints so a stray “make it brighter” cannot talk the model into outlining your facade. Chat Agent mode is for when you would rather not: upload the daytime photo, the AI writes the zone list itself, you read it, you confirm, and the render lands about a minute later. That is the other half of this pair.
Same four decisions either way. The only question is who makes them.
FAQ
Does this template work with other AI tools? The structure is universal — any capable image model responds better to zone-fixture-aim-temperature than to “make it premium.” Two things are different inside LDR’s Rendering mode: the negative constraints are enforced by the system rather than left to the model’s discretion, and you are transforming a photograph of your actual site rather than generating a building from scratch.
Does the 4-part structure work for interiors and landscape? Yes. The skeleton does not change: swap the role sentence for the right discipline, write the zone list in spatial order, keep the negative constraints. Landscape lists tend to run longer because planting is itemised by species and height.
How detailed is detailed enough? One line per luminous zone, with all four decisions on every line, plus the negative constraints. There is a useful side effect here: any zone you cannot write a line for is a zone you have not actually designed yet.
A prompt written to this standard gets you to roughly 60 out of 100. Going further is not about more words — it is about marking fixture positions on the daytime photo and annotating on the canvas. See Why AI Edits Get Blurrier.
Do I need to write it in a particular language? Write it in whichever language you think in. The structure is what carries the meaning, not the phrasing.
Try it on your own project
Open LDR, take the 5 free credits, and run one of your own daytime images through Rendering mode with a zone list you write yourself. Then run the same image through Chat Agent and compare. The comparison teaches more than either result on its own.